Time lapse is one of the most interesting techniques for photographing long-running processes for fairly quick viewing on the screen. Such processes include the opening of a flower, sunrise and sunset, the movement of people and cars, and construction. Time lapse allows you to “speed up” a two-hour filming down to one minute. The result is certainly impressive...
Time-lapse is a slow-motion film or photograph with an exact number of frames per minute, which are then combined into one video sequence.
Previously, time lapse was called time-lapse or time-lapse photography, and it was considered very difficult. It was first used by the French director Marie-Georges-Jean Meslier in 1897 in the film “Carrefour De L'Opera”. Today, in the age of rapid development of digital technologies, this technique has become much more accessible and easier. If you know a few simple rules, you can make a good timelapse even a beginner can do it.
Work in manual mode
For this:
- Set the camera to “M” mode (fully manual), then your pictures will be the same in colors, lighting, and so on;
- Set the lens to “MF” mode (manual focusing mode) and focus on the object you want, then the camera will not be able to change the focus point itself and you will avoid distortion in the picture. Or use a completely manual lens, then you will get rid of the aperture problem in the future;
- Set manual white balance so that the colors in all images are equal, or shoot in RAW, then you can set the white balance during subsequent photo processing or directly when stitching images into a video sequence;
- Disable the stabilizer on the camera and lens.
You will need
- Sturdy tripod. A reliable tripod, such as the Manfrotto 55RC, is a must for quality timelapse. If it is not stable enough, even the slightest vibration can ruin all your efforts. If you don’t have one, and this is a very expensive pleasure, then you will definitely have to load up your lightweight tripod. Surely there is a special hook on the bottom? This is where you can hang the load; a women's bag with full ammunition will do;
- Clean memory card. You may have to take over a thousand photos in RAW format, and even if you make do with regular JPEG, it will require a considerable amount of memory;
- Remote control or laptop connected to the camera. They are used to ensure that there is not the slightest hesitation when releasing the shutter manually, so it is better to trust modern technology.
About shutter speed and aperture
The ratio of shutter speed and interval between frames should be 2/1, that is, if the shutter speed is 2 seconds, the interval between shutter releases should be 4 seconds.
Many professionals advise shooting in “A” mode (aperture priority) and setting the exposure meter across the entire frame, as you will inevitably encounter flicker - flickering of brightness from frame to frame. That is, if the camera calculated 1/60 of a second for one frame, and then the sun came out from behind the clouds and the shutter speed became 1/1000 of a second, then in the final video sequence you will have light and dark frames in a row and the overall image will flicker. Therefore, it is recommended to use manual mode and shoot each frame with the same parameters.
Now about shutter speed and the interval between frames. As mentioned earlier, it is best if the shutter speed is half as fast as the interval between shutter releases. In other words, if the interval is 4 seconds, then the shutter speed should be set to 2 seconds. This is optional, but highly desirable, and is explained by the fact that movie cameras have a device called a shutter. This is the name of a disk whose one sector is transparent. It rotates at 24 revolutions per second and every half revolution allows light to enter the film, meaning it is exposed for 1/48 of a second at a moving speed of 24 frames per second. With such a shutter speed, fast moving objects are “blurred”, but we perceive this naturally. If it is longer, the time-lapse video will become “jerky,” so to ensure its smoothness, you need to set the shutter speed to half the time between shutter releases.
Approximate intervals between frames:
Fast clouds: 1–2 seconds;
- slow clouds: up to 10 seconds;
- starry sky: 20–30 seconds, pause - 1 second.
This should not be taken as a law; camera settings can only be set correctly at the shooting location, because they depend on many light sources, both natural (sun, moon, sky) and artificial (lanterns, car headlights).
About photosensitivity
Don't set your ISO higher than your camera allows. By the way, cameras make more noise when they heat up, so if you are shooting time-lapse in the sun, you can cover it and the lens with a white or reflective opaque cloth. For example, for a Canon 5D Mark II, the ISO value should not exceed 3200 units.
A few more useful little things:
Use a lens hood to minimize glare;
- to save battery power, disable the function of viewing frames after shooting;
- when shooting late in the evening, closer to night, introduce slow exposure compensation.
Shooting early morning, afternoon and evening
When shooting during the day, when the camera offers a shutter speed of 1/1000 of a second, it is better to use darkening filters, similar in design to polarizing ones. They increase the luminous flux up to ND 400 depending on the rotation relative to themselves. If you want to shoot a timelapse in the early morning, at dawn, or in the evening, at sunset, remember the so-called “golden hour”. This is the first hour after sunrise and the last before sunset, although its exact duration varies depending on the time of year. This time period, when the sun is low in the sky, producing soft, diffused light, is a great time to shoot a time lapse.
Before shooting, check all settings again:
- Full manual mode on the camera;
- manual focusing mode on the lens;
- disabled stabilizer on camera and lens;
- manual white balance;
- RAW/JPEG;
- charged battery;
- free space on the memory card.
If everything is ready, or so it seems to you, take 10-15 test shots, then quickly scroll through them, and if you are satisfied with everything, then start shooting, if not, then skim through this text and see what you forgot to do or did not do So.
After you have filmed all the material, a reasonable question arises: what to do with it? Why not manually insert all the frames into Windows Movie Maker? There are many programs for this, I personally recommend Sony Vegas, but before that it is better to batch process photos in Photoshop (insert a link to the lesson), because Sony Vegas will not allow you to experiment with colors and light in the same way as Photoshop "
Creating a Time Lapse in Photoshop
Step 1. Create a new project
In the “File” menu, select “New...” and set the settings for our video sequence. The resolution is better to take HD 1920×1080 24 p.
Step 2. Set the spacing between photos
In the “Options” menu, select “Properties”, then go to the “Edit” tab and in the “New still image length” section, set the time interval between photos. To create time lapses, I personally use a value of 0.060, which is approximately 24 frames per second.
You probably don’t need smooth transitions, but, just in case, they are hidden under the “Automatically overlap multiple selected media when added” checkbox.
Step 3: Add Photos to the Timeline
Since your photos are already numbered in the correct order, you can simply drag them from the Project Data or Explorer window to the timeline, and they form a finished video sequence.
Step 4. Render
Many people wonder: why do their videos weigh so much after processing in Sony Vegas? The answer to this question is quite simple: you need to choose the appropriate codecs, and the size of your videos will decrease from several gigabytes to 100-200 megabytes.
So, in the “File” menu, select “Calculate as...”, in the “Save as...” column we mark “Windows media video v11 (wmv)”, and in the “Template” column - “6.4 Mbps HD 1080-24 p video." The “Custom...” button allows you to select audio codecs. After that, click the “Save” button and wait for the end of the rendering.
If your computer does not have enough RAM for processing, then I advise you to first restart your computer by disabling startup programs, or reduce the quality of the output video by lowering the bitrate or resolution to 720p.
Check out the selection and be sure to try your hand at this unique technique!
Follow our news! Good luck to you!
- Use a reliable tripod - the camera should not move!
- Choose a memory card with plenty of free space.
- If you plan to shoot a long video, take a spare battery with you.
If you choose one of the two time-lapse shooting methods: first method, simply mount your camera or smartphone on a tripod and shoot a video.
If you have chosen second method, you will need to take photos at a certain time interval (for example, every five seconds). To do this, use an intervalometer or the corresponding built-in function in your camera.
You need to shoot video/take photos for at least 10-20 minutes. Don't forget that 20 minutes of footage will eventually turn into a 10-second time-lapse video.
Note: The following instructional steps (starting with Step 2) refer to the second method of creating a time lapse. If you initially chose the first method and recorded video material, then proceed to our instructions on how to speed up the video.
2. Download and install Movavi Video Editor
Download Movavi Video Editor, a convenient time-lapse video program for Windows and Mac. Open the file you downloaded and follow the installation instructions. After that, launch Video Editor and select the option Create a project in advanced mode.
3. Upload files to the program
Connect your camera/camcorder/smartphone to your computer and transfer the captured photos to your hard drive. Then in the Video Editor, click the button Add files(tab Import) and upload your photos to the program.
4. Create a time lapse
Uploaded photos will be automatically added to Time scale. If the default photos are not selected (not highlighted with a yellow frame), click Ctrl+A to highlight all added snapshots on the Timeline. Click on the gear icon ( Clip properties) to open the menu Tools. Find the field Duration and manually set the duration of displaying photos to 00:00:00.100 (first enter milliseconds, then seconds).
5. Add music
A high-quality time-lapse video cannot do without musical accompaniment. Return to the tab Import, press Add files and download an atmospheric soundtrack from your collection. The downloaded files will appear on a separate Audio track. You can also choose one of the melodies built into the Video Editor: to do this, click the button Music and drag the audio you like to Time scale.
6. Save your video
And now some of the promised magic: all you have to do is turn your photos into videos. To do this, just click Save, select the desired video format and click Start. That's all, now you know how to shoot a timelapse video and edit it in Movavi Video Editor. We promise, the result will amaze you!
Time lapse is a rather interesting technique, on the verge of photography and video. Recently, it has gained noticeable popularity, despite the fact that the technique itself has existed for decades. Previously, timelapse was used mainly for filming and studying slowly occurring processes and was used for scientific purposes. True, they called it by another name - time-lapse photography, interval shooting or time-lapse photography.
But let's get down to business. In short, a time lapse is a video assembled from many photographs taken at a certain interval and, as a rule, from the same point. The interval can vary from a second to several hours. It just depends on what you want to achieve in the end.
Preparing to shoot a timelapse
Preparation begins with the main thing - deciding what exactly to shoot. One of the simplest and most popular subjects, filming city life. There is always dynamics, and you can shoot from the roof of your house or from your own window. Therefore, if you decide to practice, then you should start with a similar plot. But if you want to do something truly original and exciting, you will have to use your imagination.
The most important thing is that the final video should not be a chaotic collection of moving objects, but a full-fledged mini-film with a smooth development of events.
Time lapse about Dubai. Shooting cities is one of the most popular subjects for time-lapses
Timelapse is entirely built on the dynamics in the frame, and the dynamics are sequential. Otherwise the whole point is lost. It’s certainly possible to make a timelapse on static pictures, where nothing changes over time, but few people will be interested in it.
Therefore, before you start shooting, think three times about what kind of dynamics will be in the frame. The simplest thing that comes to mind is the movement of cars, people, clouds, and some other objects. But the dynamics may lie elsewhere. Remember the scientific videos that you probably saw in childhood, because they were all time-lapses filming physical processes - how a piece of ice turns into a puddle, how a grain sprouts and a plant appears, how the shape of an object changes over time, how a piece of bread left on the table turns into cracker, etc.
What do you need to shoot a timelapse?
Firstly the camera. Contrary to some opinions, time lapse photography does not require a super expensive camera with a bunch of accessories. No, of course, those who are engaged in professional time-lapse filming will argue the opposite and will be right in their own way. Special devices and expensive cameras will allow you to do something special and make the photographer’s work easier. But you can shoot a timelapse with a very simple camera. It's the same as with regular photography. In order to shoot a great landscape or portrait, you don’t have to have only a top-end full-frame camera, sophisticated lighting equipment and a bunch of assistants.
So, to get started, you will need almost any digital camera. The main thing is that it has the ability to take pictures at a certain interval. Some time lapse manuals indicate that the shooting should match the video frame rate - 24 frames per second. But that's not true. Firstly, there are not many such rapid-fire cameras, and secondly, why turn time-lapse into a complete analogue of video? This makes no sense. The point of timelapse is to fit a long process into a very short period of time. Show a whole day in the life of a city in just 10 seconds or how a plant grows not in a month, but in just a minute.
Incredibly beautiful tilapia about climbers on Everest
Another important component is the remote control to minimize possible camera shake while releasing the shutter. Ideally, a programmable remote control with a built-in timer. You can look for remote controls from both original (Canon, Nikon) and third-party manufacturers.
Some cameras have the option of time-lapse shooting directly in the camera settings. For example, Nikon d200/300/700/7000 has such an opportunity, read the instructions for your camera carefully, you may be pleasantly surprised by the presence of such an opportunity
If there is no such function, there is another way - you can look for alternative firmware for your camera that implements a similar function. For example, for Canon, such firmware is available on the website. But this is a dangerous path - since unofficial firmware from someone unknown can easily ruin your camera.
The third way is to connect the camera to a laptop or computer and remotely control it using proprietary utilities. For example Canon EOS utility. It all depends on whether your camera has the ability to be remotely controlled from a computer.
If you don’t have any of this, then don’t despair. You can always just gently press the shutter release at a strictly defined interval. Yes, it is tedious, dreary, but “art requires sacrifice.” Come up with a shooting scenario where you don’t need too short an interval between frames and the task will be significantly simplified.
One of the most essential items for time-lapse photography is a tripod. Because if the camera moves even just a little, it can lead to catastrophic consequences for the final video.
It’s also worth considering the size of the memory card, especially if you shoot in RAW and decide to create a large timelapse of hundreds of frames.
Well, the most important thing is to have patience. Especially if you plan to shoot a timelapse somewhere outside your cozy apartment. Also take into account weather conditions, especially if you decide to shoot timelapse in winter or autumn. After all, you can simply freeze, batteries can quickly run out in the cold, and in the fall it can suddenly rain and get the camera wet if you don’t think about how to close it in advance.
How to make a time lapse. Let's start shooting
So the easiest way.
Place the camera on a tripod and securely fasten it. We set the exposure settings to manual mode. Turn off autofocus. Disabling autofocus is very important, since with automatic focus, the camera may focus on the wrong object when shooting the next frame and you will get a “jump” in the image in the final video. It’s also worth turning off all image stabilizers, they can only be harmful when shooting from a tripod. It is better to switch the white balance to manual mode, and shoot in RAW so that later you have more opportunities for error correction.
When you're ready, take a few test shots to make sure the exposure is correct. Now the most important thing is to decide on the interval. It is difficult to give any exact recommendation here, since the interval may depend on many parameters. Starting from the scene itself, ending with weather conditions and wind speed (if clouds are one of the shooting elements).
So try and try again. For example, start by filming the scene at intervals of 1 frame every 2-5 seconds. See what happened and adjust the time. Don't do too short intervals. Remember, we are shooting time lapse, not video.
If you are shooting time lapse in low light conditions, keep in mind that the interval between frames should be at least twice as long as the shutter speed. For example, if the shutter speed is 1 second, then the interval should be at least 2 seconds.
If you are going to crop the final video to the aspect ratio adopted in the video (for example, 16:9), then learn this when composing the frame, so that after cropping, important details do not end up outside the frame.
There is one nuance called “aperture flicker”, which is expressed in a change in the brightness of the exposure between frames and is associated with the technical features of the implementation of the aperture on modern lenses. To reduce the impact of this effect, try shooting with the aperture wide open. In addition, again, it’s worth shooting in RAW, so that if this effect occurs, you can correct the exposure programmatically in the editor.
Lastly, think about the viewer. He will be bored watching a long video if nothing particularly interesting happens in it. Keep this in mind when choosing a subject and shooting interval.
Editing a time-lapse video
The last point remains. How to make a video from all the shots taken. The first thing you need to do is look through all the frames and process the photo - do color correction, exposure correction, etc. In this case, it is important that the final image on nearby frames does not visually differ much in these parameters. If you turned up the brightness too much on one of the videos or changed the white balance too much, this will be instantly noticeable in the video.
After the entire series has been processed, you need to edit the video. Any video editing program, such as Adobe After Effects, is suitable for this. Upload pictures into the program as separate frames, add music, effects, etc. Here you will also have to experiment to achieve a good result.
And finally, one of the largest and most amazing timelapse videos made from space, from the ISS.
Time lapse– these are photographs taken sequentially, with a certain interval, and subsequently combined into a video sequence. With its help, you can capture long-term processes in a relatively short period of time, for example, city life, car traffic, sunrise and sunset, the movement of stars, etc. Knowing some simple rules, even a beginner can cope with time-lapse photography.
What do you need to shoot Timelapse?
- A tripod or any other stable stand for the camera.
- Volume flash card.
- A camera with an interval shooting function.
- Remote control.
- Laptop.
Where to begin?
First you need to decide on the scene to be filmed, arrive at the location in advance and make settings.
For time-lapse, we will need to take hundreds, or even thousands of frames with the same amount of time between them; for this we will use time-lapse photography on a camera. If the camera does not have such a function, then special utilities on the laptop, for example, eos utility, will do. Or you can manually press the shutter button on the remote control (a method for the overly determined).
Here are the approximate intervals for the scenes being filmed:
- 1-2 seconds between frames is good for shooting fast moving objects, people, fast clouds, cars.
- 3-5 seconds will be optimal for slower scenes, such as slow clouds.
- 10+ seconds are much less common in timelapse when the scene being filmed is moving very slowly, for example, fog on a river.
These numbers are approximate, and everything depends only on you and your ideas. If you want your final picture to be more dynamic and sharp, make the interval larger; if, on the contrary, you want to make the scene smoother, then make minimal intervals.


Shooting process
- We put the camera on a tripod.
- Switch to manual mode.
- We also turn off autofocus on the lens so that the camera does not point at different objects and there are no problems with sharpness in the future.
- We also set the white balance to manual control.
- If there is a stabilizer, we also turn it off, on the camera and lens.
- The choice of photo quality (RAW/JPEG) is up to you, JPEG will save space on the flash card, RAW will give you the opportunity to make corrections to the resulting images during post-processing if something goes wrong.
- Turn off photo viewing after shooting to save battery power.
- We put a lens hood on the lens to avoid excessive flare.
- We set the ISO to minimum, and don’t close the aperture too much. F9-11 is enough to keep all objects in sharp focus. The shutter speed is up to your taste, the trick of timelapse has always been the distinctive sharpness of the image, so when shooting during the day, it is best to set the shutter speed faster; a longer shutter speed is used if we want to show movement in the frame (not cars, but the trail of headlights from them, unfrozen water in the river, and the movement of waves).
Please note that if you are shooting in low light conditions (shutter speed more than 1 second), then the interval between frames should be twice as long as the shutter speed, for example, with a shutter speed of 2 seconds, the interval will be 4 seconds.
Now everything is ready. Manually focus the lens. Start by filming the scene at 2-5 second intervals if you're not sure which interval will work best. See what happens and adjust the time.
Take about 15-20 more frames, use the scroll wheel to quickly view the resulting scene, if you are not satisfied with something, then correct it again - and you can start shooting.
Calculate the required number of frames in advance. For a 10 second video at 24 fps (standard frame rate in Europe), we need to take 240 frames. At an interval of 1 second, the shooting time will take 4 minutes (240 frames divided by 60 seconds). At an interval of 2 seconds – 8 minutes, etc.
Timelapse video editing
The last point remains. Creating a video from captured photos. The first thing you need to do is view all the frames and process them: make corrections to color, light, etc. It is important that the final image on nearby frames does not visually differ much in these parameters. If you overdo the correction in one of the pictures, it will definitely be noticeable in the video. Therefore, it is better to batch process photos.
After the entire series has been processed, you need to edit the video. Any video editing program, such as Adobe After Effects, is suitable for this. Upload pictures into the program as separate frames, apply effects, filters, music, etc. Everything here is up to your taste.
Finally, a few fascinating Timelapses for inspiration, have fun creating!
1103

Irina Dorosh
“The simplest thing is to press the button at the right moment”: a sincere and interesting conversation with a specialist in children’s and family photography.
Category: Interview 07.12.2017
Polina Maslenkova
To prevent your winter shots from turning out too dark or overexposed, and the snow on them from looking blue or gray, you need to know a few tricks that will allow you to create beautiful winter photos in both frost and snow.
Category: Inspiration Ideas Instructions Training Advice 12/11/2017
Polina Maslenkova
New Year's holidays are the best time to create bright, beautiful, positive shots! Today we’ll tell you how to add a magical atmosphere to your photos using the most festive effect – bokeh!
Category: Inspiration Instructions Training Advice 12/26/2017
Lily Sawyer
In this tutorial you will learn how to paint snow on a photo in two ways in Adobe Photoshop: using a brush and layers. If there isn't enough snow on the streets and in your photos, create it yourself!
Category: Instructions Training Photoshop 01/12/2018
Christian Hoiberg
Category: Inspiration Advice 01/19/2018
Tracy Munson
Canadian photographer Tracy Munson will talk about how to take beautiful photographs of animals in their natural habitat.
Category: Inspiration Instructions Training 01/24/2018
Polina Maslenkova
Is it possible to take pictures in public places? Is it possible to photograph strangers on the street? You will find answers to all these questions in this article.
Category: Advice 01/31/2018
Andrey Barilo
Category: Advice Photographic equipment 02/08/2018
Polina Maslenkova
We talked to our art processing teacher and found out how medical professionals are born into photo artists and how many hours it takes to become an average retoucher.
Polina MaslenkovaIn this article we will look at how to properly photograph flowers in nature, as well as in a bouquet and in the hands of a model, in order to get truly beautiful shots.
Category: Advice 03/06/2018
Olesya Zalevskaya
We have selected 15 photographs for which people are willing to pay more than a million dollars at auction. What is their specialty, judge for yourself.
Category: Inspiration 03/16/2018What could be more interesting than a long period of time turned into just a couple of seconds of video? Dynamics, colorfulness, rapid change of perspectives - this is all about Time Lapse, and today we will tell you how to shoot it correctly!
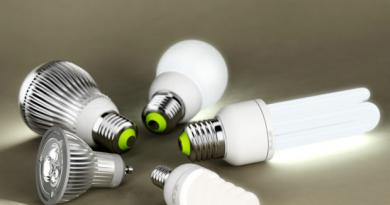
When purchasing a camera, from a consumer point of view, we always want as much as possible from our gadget: more options, higher resolution, improved stabilization, and of course the presence of interesting accessories, such as a time-lapse timer, ND filters to give a cinematic look, and much more. The GoPro brand fully copes with these requirements, meets all expectations and even more.
Time Lapse is an option that they did a great job on - the GoPro camera is fully adapted for this mode. In this review, we'll look at how to quickly activate this mode and select the desired settings using the GoPro HERO6 Black as an example.
Step-by-step instructions in 4 steps
1. Tap anywhere on the screen so that menu icons appear on the screen. Then, in the lower left corner, click on the “Modes” icon.

2. In the upper right corner of the screen, click on the “Time Lapse” icon and select “Time Lapse video” from the drop-down menu.

3. Set the desired resolution, interval and viewing angle using the buttons located at the bottom of the main screen. 

4. Use the record button to start and stop shooting

Example of shooting Time Lapse video on GoPro HERO6 Black in 4K resolution
Additional Time Lapse Modes
In the second paragraph above, we mentioned that you need to select “Time Lapse video”, and this is indeed the most optimal and common mode of Time Lapse operation. But there are also others, now we will briefly talk about them.
- Time Lapse video- the camera takes a whole series of photos at a certain interval, then combines these frames into a video file.
- Time Lapse photo— the principle of operation is very similar: the camera takes photos at a certain interval, but does not combine them into a video. The main difference is that it is not a video file that is saved on the memory card, but a series of high-quality photos. Each of them can be used separately, or, again, the video can be stitched together in Time Lapse manually during post-processing.
- Night Lapse photo - works the same as Time Lapse photo, but all settings are adapted for shooting in low light.
Resolution for Time Lapse
For time-lapse shooting, you can choose between 4K, 2.7K 4:3 and FullHD (1080p) resolutions. There is no audio recording in Time Lapse. The sound will be distorted during accelerated filming, and the voice will sound as if you inhaled a helium balloon, and very quickly!)
Shooting interval
In other words, the amount of time that should pass between each frame. If we talk about HERO6 Black, you can set the default settings - 0.5 (half a second), or 1, 2, 5, 10, 30 and 60 seconds.
Short intervals like 0.5 are great for shooting streets and cities, and in general in all places where there is a lot of movement.
Longer intervals are best used if you need to shoot a sunset or something very long. A great example is building a house - a project that takes days, but the video captures it all in a few minutes.
Viewing Angle for Time Lapse (FOV)
These settings control how wide the camera will cover the scene. We can say that this is similar to changing the lens of a classic camera: a wide-angle lens shoots much wider than a portrait lens, only in GoPro cameras this happens using digital technology.
By default, GoPro sets it to "Wide Angle", and that's the trick of these cameras - to shoot with a fish-eye effect. And for filming in 4K, this is the only option available. At lower resolutions, you can use digital zoom, setting the viewing angle as needed.
Rotary Time Lapse Timer
Imagine a static Time Lapse video, where as the shooting progresses, the scene slowly turns in a certain direction, thereby revealing the frame more and more. This accessory will definitely decorate Time Lapse even more.


The principle of operation is very simple: the camera is fixed on the platform and shooting starts, then the device makes a full rotation of 360 degrees within 60 minutes, ensuring smooth and measured movement of the camera without any jumps. There is no way to record such a Time Lapse by hand - the frame will constantly twitch.
You can talk about the time-lapse timer for a long time, but it will be easier and clearer to show it. Watch the video below to see with your own eyes what kind of shots you can get with its help.