Every builder knows that a solid foundation is the key to the durability and strength of any building. Even such very light and small-sized structures as gazebos also need a solid foundation under them. It is clear that the foundation for a heavy house and for a small building will be different, but you should not neglect some rules and approach the construction process with irresponsibility. After all, if you do not equip a high-quality foundation for a gazebo, you will only be able to enjoy relaxation in it for a very short time; the structure may be damaged and, in extreme cases, collapse. Foundations come in different types. Therefore, in this article we will look at: what types of bases there are, how they differ, which one to choose and how to do it correctly.
Types of bases and their choice
As for the construction of residential buildings, various types of foundations are used for the construction of gazebos. They differ in design, materials for manufacturing and device technology. Their choice depends on many factors, the main of which are:
- total weight of the structure;
- the nature of the soil at the construction site;
Still, when laying a foundation, your main task is to make sure that it is sufficiently reliable and durable. To do this, let's look at the different types of bases.
Pile type - better suited for viscous soil with a high clay content. The presence of clay gives the soil a high level of deformation, so a foundation on piles would be an ideal option in this case.

Columnar foundation. This type of base is the most common. When your soil is rocky or sandy, this type of foundation is recommended. This type of soil is called non-heaving, as it undergoes minimal deformation. Even someone who has never encountered such work before can carry out such a foundation, because this is the simplest and most economical method that does not require professional knowledge and skills. The technology for arranging the base is simple: pillars made of various materials need to be installed evenly around the entire perimeter, a wooden frame (grillage) will be installed on them, on which vertical beams for the floor will be placed.

Slab or solid foundation. It can be called the most universal type, which can be used on any soil and with any weight of the gazebo. The essence of the work is to construct a drainage base site by laying concrete blocks. Such a monolithic reinforced concrete slab is resistant to various deformations. Often this type of foundation is used when the groundwater level is high.

Strip foundation. As with the construction of houses, a fairly reliable and common type of foundation follows the design of load-bearing walls. If you make it into a gazebo, it will last much longer than the building itself. It's all about durability. To construct such a foundation, you need to dig a trench, make formwork and fill the entire perimeter with concrete.

Tire foundation. With rising prices for building materials, such foundations are becoming very popular among summer residents, as they do not require special investments, but are quite reliable. This design is quite simple and looks unusual, but impressive.

These types of bases will help your gazebo last a very long time. But remember that “the miser pays twice.” To prevent this from happening to you, it is better to take care of a good foundation. Maybe some of you have already had cases when construction was done without a solid foundation. Tell me, how long did it last? How satisfied are you with your decision? Write it in the comments so that all readers can learn from your valuable experience.

Having decided to make a foundation, be prepared for the fact that even without construction experience this is feasible if you strictly adhere to the recommendations, technology, make the correct calculations, plan and follow them.
The first type of foundation that we will consider is columnar, which is used in most cases due to its ease of construction and relatively low cost. Due to its design and features, it can be installed on quicksand and other difficult soils. It can be built from various materials, such as brick, metal and asbestos-cement pipes. Construction of the foundation is possible in the following options:
- Installation of asbestos-cement pipes, which need to be dug into the ground, compacted and filled with concrete mixture with reinforcement. This base option is suitable for a wooden gazebo or frame structure.
- Installation of metal pipes that do not require pouring concrete after installation. Such pipes are strong in themselves, so they just need to be deepened into the ground and compacted well. To protect the metal from corrosion, it must be coated with a special anti-corrosion agent.
- Installation of wooden posts, thanks to which it becomes possible to build an open-type country-style base from a wooden frame. Such poles can be used even on quicksand.
- Installation of concrete blocks. This base is one of the most durable and reliable, therefore suitable for heavy, massive closed gazebos with solid walls.
- Installing brick support pillars is the most common, inexpensive and simple option of all. It is universal and suitable for the construction of any gazebos.

But in order to properly make a columnar foundation, you need to adhere to some rules:
- Support posts must be installed at each corner of the external walls of the entire building so that the load is distributed evenly. If the gazebo is large and has a partition, you also need to install an additional pole under it.
- The pillars need to be placed around the perimeter in increments of 1.2–1.5 m, depending on the size and weight of the gazebo.
- In the case where the closed gazebo has a large mass (some gazebos are equipped with a barbecue, barbecue, or heavy furniture), and its walls are made of brick, it is recommended to lay a brick plinth between the pillars. Then the foundation will become more reliable and strong, able to withstand the load of the gazebo.
- When the foundation is made on clay soil, it is necessary to install support pillars only around the perimeter. By installing the pillars inside, you will contribute to the fact that in winter, when the soil freezes, the foundation will become very distorted, this will lead to very unpleasant consequences.
- To prevent the pillars from being pushed outward when the soil heaves and to ensure waterproofing, it is necessary to wrap the pillars with materials such as PVC film or roofing felt. For brick pillars, you can use other materials that will provide waterproofing and prevent soil from sliding off the surface.

So, when all the rules are known, the choice of material has been made, you can proceed directly to the construction of a columnar foundation. The scope of work is as follows:
- site cleaning;
- digging or drilling holes for poles;
- preparing holes for installing poles;
- installation of pillars and pouring them with concrete.
And now about everything in order and step by step.
Columnar foundation

To complete the work, you cannot do without the following materials and tools:
- drill of the required diameter for digging wells;
- hammer;
- crowbar for rocky soil;
- gravel and sand;
- roulette;
- ready-made concrete solution (cement, sand, crushed stone, water);
- concrete mixer or container for manual mixing;
- Bulgarian;
- shovel;
- fittings Ø10 or 12 mm;
- manual rammer;
- level and fishing line;
- asbestos-cement or metal pipes, bricks or blocks - the material of choice from which the support pillars will be made;
- waterproofing material (roofing felt, hydroisol, aquaizol);
- wooden beams or a metal channel that will serve as a grillage for tying the foundation.

Once everything is prepared, get to work. To simplify the task, we will divide the work on constructing a columnar foundation into several stages:
- First you need to do the preparatory work. The area must be cleaned and cleared of debris and anything that will get in the way. Based on the size of the future gazebo, make markings on the soil. In the right places, mark the places where you need to dig holes for the pillars (if these are concrete blocks or brick pillars, then the holes can be square).
- Now you need to dig holes of the required depth, which depends on the weight of the gazebo, the type of soil and the depth of groundwater. Wells can be made with a hand or mechanized drill or an ordinary shovel. Their width should be slightly larger than the width of the pillars that will be installed.
- Place a 100–150 mm layer of sand at the bottom of the dug well, moisten it and compact it tightly. Then pour a 50–100 cm layer of a mixture of gravel and sand, also compacting it well. To determine the thickness of the layer, use a wooden stick, which must first be marked. Or make the necessary notes in the hole itself.
- Further, the procedure will be different, depending on the material from which the foundation will be made. For example, when using asbestos-cement pipes, they must be installed evenly in the wells. To achieve perfect vertical evenness between all posts, stretch a fishing line to serve as a guide. After that, the space outside the pipe must be filled with soil to fix the pipe. Now all that remains is to fill the pipes from the inside with concrete mixture, but not completely, but a little more than half. To form a concrete pad, all pipes need to be raised slightly. Then fill the concrete completely. To make the base more reliable, a mesh of Ø10 or 12 mm reinforcement must be placed in the pipe before pouring.
- If the pillars will be erected from concrete blocks or bricks, then you first need to pour a concrete layer on which the blocks or bricks will be laid to the desired height.
- The last stage is tying the support pillars (grillage). But before that, you need to lay 1 or 2 layers of waterproofing material on them, for example, roofing material, waterproofing agent or aquaisol.
The concrete will dry for about a month. On this basis, your gazebo will stand for a long time. Subsidence for such a foundation is minimal, since cushions of sand, gravel and concrete were poured onto the bottom. Now you can carry out work on the construction of the future structure.
Making a slab base

A solid or slab concrete foundation must be made when the gazebo is equipped with a barbecue oven or barbecue and solid closed walls, which gives it a lot of weight. Before work, prepare the following tools and materials:
- shovel for digging a trench;
- cord and pegs for marking;
- gravel, sand and broken bricks;
- roulette;
- hammer;
- concrete solution;
- boards, nails or screws;
- reinforced concrete slabs;
- manual rammer;
- crowbar for rocky soil;
- flexible wire;
- concrete mixer or container for mixing concrete manually;
- facing material;
- waterproofing (roofing felt, hydroisol or aquaizol).
First, clear the area under the foundation. Mark the area using pegs and string. After which you need to dig a pit of the same shape as the future gazebo. Its depth varies depending on the height of the groundwater. To simplify the task, a pit can be dug by calling an excavator. So, you will save your energy, but you will have to pay for its rent. If you want to save money, take a shovel, ask friends or relatives for help and do it together.
When groundwater lies close to the surface, it is mandatory to install a drainage layer. At the bottom you need to lay a layer of crushed stone, broken brick and sand. Compact all this thoroughly with a hand tamper. After that, the surface around the perimeter is covered with a waterproofing layer, on which reinforced concrete slabs will be installed.

If you want to pour monolithic concrete, then first you need to lay a frame made of reinforcement on the drainage layer. Along the perimeter, formwork is made from ordinary boards, which are nailed together or screwed together. To make a reinforcing mesh, you will need Ø12 or 14 mm reinforcement rods, which are connected using flexible wire. Lay the reinforcement and fill everything with concrete.
To improve the quality of concrete, a plasticizer can be added to it.
The entire surface must be leveled, expelling the air, and wait a month until the concrete gains full strength. To protect the foundation from external factors and mechanical influences, cover everything with plastic film. On days 10–12, the formwork can be removed, and if the weather is very hot, the concrete can be slightly moistened so that it does not crack. After it dries, it can be finished with decorative tiles or wooden planks.
Construction of a strip base
Strip foundations are especially good for gazebos because their structure allows the construction of buildings of any design, shape and type. Moreover, it is able to withstand heavy loads and last a long time. A shallow foundation can be arranged for brick, wooden and frame gazebos with a large mass. Thanks to its design, the entire load is evenly distributed over the entire surface. If you plan to put a grill or barbecue oven inside, you can make a concrete pad under them separately.

The tape can be concrete mixture, bricks or blocks. To make such a base, you will need:
- rope and pegs for marking;
- shovel for digging a trench;
- crowbar for rocky soil;
- building level and plumb line;
- sand and gravel;
- boards or plywood for formwork;
- concrete mortar, bricks or blocks, depending on choice;
- if the tape is made of blocks or bricks, then make masonry mortar;
- roofing felt to provide waterproofing;
- reinforcement bars Ø12 or 14 mm;
- Master OK;
- facing material;
- roulette;
- hammer.

Let us again divide all the work step by step:
- As always, the area must be cleared and markings done based on the design. The stakes need to be driven into the corners of the building, respecting the dimensions of the gazebo. They are connected using a cord, which serves for orientation. Everything needs to be measured with a tape measure, sides and diagonals, and if everything fits, step back 200–400 mm on all sides and make exactly the same markings.
- Now dig a trench around the entire perimeter, following the markings. Do all work with a shovel, checking the verticality of the walls with a plumb line. The bottom of the trench should also be level. The depth of the trench depends on the mass, soil and water occurrence and can range from 600 mm to 1500 mm.
- Place a 100–150 mm sand cushion at the bottom and compact it. Then again 50–100 mm of gravel, which is also compacted.
- Further work depends on the material of the support. If you fill everything with concrete, then you need to make formwork above the pit along the entire perimeter, the height of which is 300–400 mm. It can be knocked down from boards or using plywood. A frame made of reinforcement is placed inside and everything is filled with concrete. It needs to be compacted by carefully tapping the formwork with a mallet and bayoneting the concrete. The surface is leveled and waiting in the wings. As usual, the concrete will take a month to dry. During this period, it must be covered with plastic wrap.
- If the foundation strip is made of blocks or bricks, then there is no need to make formwork. In this case, mix the masonry mortar, additionally reinforcing the rows.
- When everything is ready, you need to cover the structure with waterproofing material. The ideal option in this case would be roofing material, which spreads in 2-3 layers.
It is recommended to remove the top fertile layer of soil inside the space between the tapes.
Now you can install your gazebo on the finished foundation. After the final work on its construction, the outer surface of the base can be lined. The decorative coating is selected based on the material used during construction. This can be either decorative tiles or wooden planks, then the gazebo will take on a completely different look and will look very noble.
Car tire

Increasingly, owners of country houses began to use car tires for foundation construction. This is an inexpensive and easy way to make a good base for a gazebo. This method has several advantages:
- Durability. It's no secret that rubber is a durable material that is not exposed to various external influences. She is not afraid of moisture, frost and heat. You will get a reliable foundation with a long service life.
- Reducing loads. The advantage of rubber is that it can be deformed without losing its integrity and properties. Therefore, under heavy loads, car tires will be able to soften the pressure by evenly distributing the entire weight over the surface.
- Significant savings. Other materials mentioned above (pipes, blocks, concrete, etc.) cost a lot, especially since it is not enough to get by with just the material; you need to purchase a whole complex. But everyone can get tires for practically nothing. Thanks to this, much less effort and expense will be spent on arranging the foundation, which, if desired, is better invested additionally in the building itself and its design.
- Car tires have their own waterproofing.

The only disadvantage of this method is that when the air temperature rises, the rubber releases harmful substances. Although this drawback can be easily eliminated if you protect the tires from direct sunlight.
Anyone can make such a base from tires. All you need are tires and knowledge, which you can draw from this article. You should know that there are two types of tire foundations:
- Slab (solid).
If you want the gazebo to stand on such a base for a long time, when installing it you should adhere to the following rules:
- Do not deepen the foundation below the freezing point of the soil. It is better to make a shallow foundation that will perform well in winter.
- When installing the bottom layer of tires, be sure to check with a level that the surface is level. If you miss such an important point at this stage, it will be very difficult to correct something later. Your task is to install the tires so that their top edges are in the same plane.
- When choosing tires, it is better to choose those with a larger diameter, as these tires are much stronger.
- When the foundation is ready, its protruding parts are covered with decorative material.
It is clear that not everyone can immediately decide to build such a structure from tires. But it is worth saying that this technology has been used for a long time and there are examples that prove the success of this method. Moreover, it is appropriate to build a tire base on problematic soil with a high degree of heaving. If you decide to build such a foundation, let's look at the technology for its construction.
As always, before construction you need to know what tools to prepare. The set is almost standard:
- shovel and crowbar;
- concrete mixer;
- marking materials;
- level and tape measure;
- sand, crushed stone or broken brick;
- car tires;
- boards, screws and nails for formwork;
- hammer and screwdriver;
- roofing felt;
- fittings Ø12 or 14 mm;
- manual rammer.

To make a slab foundation, you need to clear the area: remove stones, debris, and tree roots. Be sure to remove the top fertile layer of soil, the depth of which is 200–300 mm. Now start placing the tires in two layers to ensure a strong base. When laying the first layer of tires, be sure to check the levelness of the surface with a building level. If necessary, place pieces of boards under the tires for leveling.
All voids, both inside and outside the tires, must be filled with broken bricks, crushed stone or gravel or other available materials.
You should not fill the voids only with sand, since under heavy load the foundation can shrink significantly.
On the finished tire covering you need to lay 1-2 layers of roofing material, which will provide waterproofing. The formwork is knocked down around the perimeter of the tires. The height of its sides should not exceed 100 mm. A reinforcing mesh is installed on top of the waterproofing material and all this must be filled with concrete mortar. The concrete is bayoneted, leveled and, as usual, will dry within a month. During this period, cover it with plastic.

A columnar foundation made of tires is slightly different from a slab foundation. Tires are used as pillars, into which concrete solution is poured. The order of execution is as follows:
- Cleaning the area, removing the fertile layer, digging a pit and filling it with gravel or crushed stone.
- Marking the area and installing tires level.
- A waterproofing layer is placed inside the tire at the bottom, everything is covered with crushed stone or gravel, and a cushion is formed that should be compacted.
- Inside the tires, the crushed stone should be moistened and filled with concrete.
- After 4–6 days, when the concrete has strengthened a little, you can install the timber for the formwork.
As a result, you will get a strong and durable foundation that evenly transfers the load to the crushed stone. It will last a long time, so you don't have to worry about it shrinking or deforming.
Columnar foundation of a gazebo with a wooden grillageThe variety of construction of gazebos is endless: from permanent brick structures with a designated barbecue area to light canopies.
Mostly, options are selected from durable wooden or brick materials. Such gazebos are durable and affordable. You can install ready-made barbecues in them or build them from brick or metal plates.
When choosing a suitable option, you must be guided by the functions that the future gazebo should perform. Therefore, you need to decide on the choice of construction material, the type and type of barbecue, and the place where it will be located.
Relaxation gazebos can be:
- open/closed;
- temporary/capital;
- combined.
After solving the fundamental issues, we begin to choose the type of foundation for the gazebo with barbecue.
The most common type is a shallow foundation designed for light loads. This choice is absolutely justified: most of these structures do not require a buried foundation due to their low weight.
Methods for constructing foundations for gazebos with barbecues
When building a gazebo, they follow the same rules as when building a regular residential building. Accordingly, the choice must be made based on the type of proposed design.
Selecting a base type

- A columnar foundation is a shallow foundation device that is suitable for non-heaving soils: rocky or sandy-rocky.
- Pile - for wetlands characterized by a high degree of heaving and deformation.
- The slab foundation for a gazebo with barbecue is suitable for all types of soil. This floating foundation for a gazebo with a drainage system is especially suitable in soil conditions with a high groundwater content.
All of the listed technologies for constructing gazebos are slightly different from standard foundations for large buildings.
The characteristics and features of each of the proposed base options will be discussed below.
Columnar base
This is the best option for constructing the base of gazebos made of wood and metal. During the execution process, it is necessary to make vertical load-bearing supports, where the grillage is the upper part of the wooden structure or the lowest beam of the metal frame.
Work progress

Installation of supports
The concrete slab is covered with a mortar of one part cement and four parts sand, and two bricks are placed on it in parallel.
The remaining rows of masonry are performed in a standard manner, but perpendicular to each other. The usual height of a brick pillar is about 35 centimeters.
After all the pillars are laid out, the beams are installed. Then the walls, roof and floor are built.
Pile foundation

This type is suitable for the construction of structures on loose soil with deep freezing. The most successful structures are considered to be wooden or metal gazebos: beam structures do not require a grillage.
The cheapest supports are applicable here: screw (made of steel or casing pipes) or bored (made of sewer asbestos pipes).
Installation of pile foundation. Work progress:
- marking the perimeter, clearing the vegetation layer;
- drilling wells for pipe supports/or for screw piles (0.5 meters);
- backfilling wells with crushed stone, compacting and filling wells with concrete mortar with a layer of up to 15 cm;
- immersion of asbestos pipes into the hole, the screw elements are simply screwed in to the required depth;
- Several reinforcing rods are lowered inside the pipes, which are filled with a concrete solution or a cement-sand composition with crushed stone.
Strengthening the supports is a mandatory step. The ends of the pipes must be well concreted. This will prevent moisture from getting inside and causing pipe ruptures in cold weather.
After completing the reinforcement and pouring the supports, the first beam is laid and the horizontal and vertical elements are secured to clamps.
Slab base for gazebos with barbecue

Building such a base is an expensive foundation for a gazebo with your own hands. It requires large financial and physical costs. But there is also an undeniable advantage - it is suitable for the construction of heavy and massive brick structures with a built-in barbecue.
Work progress:
- marking and cleaning the construction site;
- a pit is dug along the marked perimeter of the base to a depth of 40 to 50 cm;
- the inner side of the pit is leveled, formwork is installed around the perimeter of the foundation being laid;
- a cushion is placed under the base to protect against heaving: the bottom is covered with a layer of sand (15 cm), then with a similar layer of crushed stone;
- waterproofing material (roofing felt or polyethylene) is laid out, the ends are fixed to the inner walls of the formwork;
- to insulate roofing felt with reinforcement, backfill with crushed stone to a depth of 5 centimeters;
- from rods with a diameter of 10 mm. a reinforcing frame is assembled in the form of a lattice with cells 20 x 20 cm, the rods must be tied up;
- a 30 cm layer of fixing mortar is poured (concrete or a mixture of sand and cement).
After the slab hardens, a reliable foundation is obtained for the gazebo with barbecue. However, from the point of view of financial costs, it is quite expensive compared to other types of foundations.
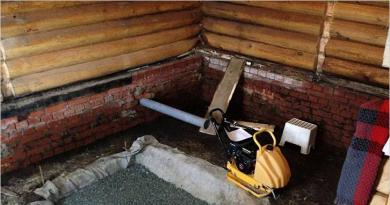
From the experience of a builder: how to make a foundation for a light wooden gazebo
The goal set by the customer was to build a foundation for a finished summer tea gazebo made of carved wood.
Choosing a foundation type
For a light wooden structure, a strip foundation will be made for the gazebo along the entire perimeter of the building. Separate concrete supports will be poured under the decking that extends beyond the boundaries of the gazebo.
Work progress

To build a foundation for a gazebo, holes are dug 50 centimeters deep. In order to prevent seasonal deformation of the soil, a mixture of sand and gravel is poured onto the bottom and leveled.
According to the project, the gazebo should “hover” above the ground. Therefore, the foundation is made high.
Removable formwork is being constructed. For its construction, wooden blocks and sheets of 10 mm plywood are used. All elements are gradually secured with self-tapping screws.
Meshes of reinforcement are placed inside the formwork, and the structural parts are tied together. The resulting formwork is filled with a mixture of sand, cement and crushed stone. For a small gazebo you will need 12 cubic meters of solution.
After the concrete has completely hardened, the formwork is removed. To prevent grass from growing through the floor of the gazebo over time, the ground is lined with geofabric and covered with crushed stone on top. Roofing felt is used as waterproofing.
Before starting to build the frame of the gazebo, all wooden elements are treated with a colorless primer. It penetrates deep into the wood structure and protects it from fungus, drying out and harmful insects. Logs are laid on a concrete base. These are beams of large section 20 x 20 cm. The beams are fixed with anchor bolts.
Before laying the board on the floor, lathing is done.
Small architectural form - this is how gazebos and other small structures are usually called in the language of architects. Small or not, it needs a solid foundation just like a big house. Let's figure out how to build a foundation for a gazebo and what is needed for this.
Minimum costs - looking for cost-effective ways
Is it possible to build a gazebo without a foundation at all? Who said no?! If there are low-moving soils on the territory of your house, the beams of the bottom trim can be separated from the wet soil with a gravel cushion. If the groundwater is low, a pit 20–25 cm deep is dug under the cushion, but if the water is close to the surface, then gravel is poured directly on top of the soil, thereby raising the structure. In any case, be sure to thoroughly saturate the trim beams with drying oil and also antiseptic substances, and regularly, at least once every few years, re-impregnate them yourself.
Columnar foundation for a gazebo - for light structures
The columnar type of base is ideal for lightweight structures made of wood or metal. Columns are built at least at the corners of the gazebo, but it is best to install one more column between the corner ones. The pillars can be built with your own hands from brick, or you can erect formwork and fill it with concrete. Formwork, in turn, is divided into removable and non-removable.
How to make a columnar foundation for a gazebo - step-by-step diagram
Step 1: Marking and preparing the site
In all cases, the process begins with marking the site for the future building. Having carried out this procedure, it is necessary to remove a decent layer of soil - up to 40 cm. This layer contains a lot of organic matter, insects and weed seeds, which in the future will sprout in the most unexpected places. It's better to get rid of all this in advance.
Step 2: Arrangement of pits
In the places where the corners of the gazebo will be located, you should dig four recesses up to 80 cm deep and 40 cm by 40 cm in size. These dimensions will allow you to lay bricks or pour concrete. Do not forget to arrange holes between the outer supports, so that there is a distance of about 1.5 meters between the posts.
For brick pillars, you should pour a sand and gravel cushion into the pit with your own hands. 15 centimeters of such a pillow will be enough. Compact it and place one layer of roofing material on top so that it completely covers the materials and its edges are curved upward. Pour several buckets of concrete mortar directly onto the roofing material to form a durable base at least 10 cm thick. This procedure is especially important for moving soils. It takes 3-4 days for the concrete to completely harden.
Step 3: Laying Bricks
Afterwards you can start laying bricks. Prepare a standard 1:4 cement-sand mortar and apply a layer to the concrete base. Then lay two bricks, placing them parallel to each other. Between the bricks in the center you can place a rod of reinforcement, which should protrude 10–15 cm from the top of the finished pillar. This rod will allow you to easily secure beams or bricks of walls in the future. The foundation pillars should be raised 30–40 cm above the ground level, depending on how high you want to raise the gazebo. You can begin installing the first beams within 1–2 days after laying the bricks.
What if there is simply no time for the concrete to harden, and then the fastening solution? A very quick way to make a columnar foundation, on top of which you can almost immediately build a gazebo structure - instead of bricks, use asbestos pipes with a diameter of 15–20 cm. You don’t have to dig holes for them, but make them yourself using a drill, only the diameter of the hole should be 5– 10 cm more. The space between the walls of the pit and the walls of the pipe is filled with sand and fine crushed stone. And concrete solution is poured inside. The ends should be sealed very carefully so that moisture does not penetrate inside. There is no need to wait for it to harden - you can start building the bottom frame, floor and other elements of the gazebo on the same day.
A pile foundation for a gazebo has much in common with a columnar one, however, the piles are placed closer to each other and distributed around the entire perimeter, so that the structure rests on the piles over the entire floor area. Engineers have developed many variants of screw piles, which have screws on one edge for digging into the soil. A very important rule when working with such elements is that even if the pile enters the ground unevenly and goes at an angle, under no circumstances try to correct the mistake by unscrewing it. This will loosen the soil, which will shrink in the future.
For solid structures - strip and slab foundations
Brick or stone gazebos are by no means uncommon. They are built to last for many years, you can equip a barbecue inside, glaze the walls and spend time inside not only in summer, but also in autumn-winter days. For such small architectural forms, you will need a solid foundation on which it will be convenient to lay brickwork - strip and slab foundations have exactly this quality.
For objective reasons, a slab foundation for a gazebo is used very rarely - the financial and time costs are unreasonably high. Judge for yourself - in addition to the standard marking and clearing of the construction site, you will need to dig a considerable pit up to 50 cm deep. Then formwork is formed on the inside of the pit. A 10–15 cm layer of sand and fine crushed stone is poured into the bottom of the dug hole. A layer of roofing material or polyethylene film is laid on top - this layer will act as waterproofing.
Another 5 cm of crushed stone is poured on top of the waterproofing - its task is to protect the previous layer from contact with the reinforcement. The reinforcing frame is assembled from rods with a cross-section of 10 mm, forming a lattice with cells whose sides are equal to 20 cm. Then concrete is poured with a thickness of 25–30 cm - it should rise slightly above the ground level. This slab will harden within a few days.
With a strip foundation there is much less hassle, but the result is no worse. For a gazebo, it is enough to deepen the base to a level of 20–30 cm below ground level. Width – 10 cm more than the expected wall thickness. To save time, you can build formwork from pieces of old slate - you can leave it in the ground.
A frame made of reinforcement is placed inside the formwork, and then pouring is carried out. If you are lucky with a flat area with motionless soil, then you can get by with a very simple option - build a foundation for a gazebo with your own hands from old tires. They are laid out around the perimeter and a lower trim is built on top. Under its own weight, the gazebo will sit firmly on this foundation. By the way, even moving soils are not afraid of him.
The foundation for a gazebo is one of the most important “nodes” of construction, on which the reliability and stability of the entire structure will depend. It is important not only to correctly make the foundation, but also to choose the most practical and suitable option.

Interesting base of an octagonal gazebo made of blocks
It is not always advisable to use an expensive and massive base for an ordinary classic gazebo.
In most cases, you can save a lot of money at this stage.
This article will list the most popular options for constructing a foundation specifically for the construction of a gazebo, and also describe particularly complex and important steps in its installation.
The gradation of bases will go from the cheapest and simplest to the most expensive and reliable.

Appearance of foundations on paper
First of all, let's consider the columnar version, which relatively recently began to be used for the construction of small structures such as gazebos. Then we will consider more capital ideas of the tape and monolithic type.
Columnar
To manufacture this option, the least amount of building materials is used. Not in all cases it turns out to be the cheapest (with the exception of foundation blocks and tires), but with the right approach to construction it is very reliable and stable.

Classic columnar foundation for a gazebo (with a log in the center for the floor)
Blocky
If you have come across the purchase of a ready-made gazebo, then you have probably seen that in most cases builders offer solid structures as the basis for the structure. foundation blocks with dimensions 20 by 20 by 40 cm.
The price of each of them varies from 100 to 300 rubles, and in total, to build a foundation you may need from 9 to 54 such blocks (the total cost will be around 2-7 thousand rubles). For example, you will need 12 blocks.
 Blocky
  Using paving slabs
  Brick blocks
This is the cheapest, fastest and most popular way to organize a foundation in modern construction. From time to time, problems arise with the movement of the ground and further “subsidence” of the gazebo to one side. This can be avoided by making concrete holes for each block.
In addition to blocks, brick or paving slabs can be used.
Below is a video that shows the process of building a gazebo with a block foundation.
Bored piles
Bored piles are pipes made of concrete mortar using reinforcement, which are installed around the perimeter and in the center of the gazebo.

The manufacturing technology is as follows:
- Wells are prepared using a special drill.
- A round roofing material waterproofing is laid inside, which will protect the piles from the effects of water.
- A small (not necessarily to the end of the well) asbestos-cement pipe with a height of about 30 cm is inserted.
- Concrete solution is poured inside and reinforcement is inserted.


As a result, we have full-fledged concrete piles, which will serve as an excellent foundation for future construction. Each pile will cost about 400 rubles of building material.
TISE with expansion in the ground
By analogy with bored piles, TISE (individual construction technology and ecology) is made with an expansion at the bottom of the earth “cushion” (photo on the right). Thanks to this additional layer of concrete, the bearing capacity of the foundation increases even more. The cost of each pillar increases slightly and is about 500 rubles.


 Installing the bottom trim on poles
The result is concrete pillars with excellent load-bearing characteristics, which are enough to support a small country house 6 by 6 meters. Therefore, such a foundation is more than enough for a gazebo.
Screw piles
Metal piles are used in cases where it is necessary to significantly raise the structure of a structure above the ground or to install a gazebo on the water. In this case, screw piles are used, which are tightened using special equipment or a lever mechanism (crowbar and long pipes).

The cost of one pile varies from 800 rubles and above. If you order a turnkey installation, then with screwing, concreting and level marking, the price will be several times higher - more than 2 thousand rubles per pole.
 Screw piles
 Possibilities of screw piles on water
Below is a video about the quality and reliability of screw piles compared to concrete ones.
Tape
The most popular and frequently used type of foundation in construction (not only for the construction of gazebos). It is a tape that is poured around the perimeter and in places of the load-bearing walls of the building.
In the case of gazebos, in 99.9% of options, pouring concrete around the perimeter is enough, unless you plan to install a stove complex.

Rectangular tape version
The manufacturing process is as follows:
- A trench is dug to a depth of about 30 – 40 cm.
- Wooden formwork is installed strictly level to a height from the ground of about 20 cm.
- The bottom is sprinkled a little with crushed stone and sand literally 1 – 2 cm.
- Concrete solution is prepared and poured to the upper level of the formwork.
- The formwork is disassembled after the concrete has hardened (after 10 – 14 days).


Monolithic (slab)
The most reliable and massive foundation, the load-bearing capacity of which is sufficient to support not only light gazebos, but also full-fledged concrete high-rise buildings.

The monolithic base is a continuous concrete screed using reinforcement. This option is suitable for capital objects of type and. In cases with wood and metal, tape or any other is sufficient.


 Site reinforcement
From tires
Quite a crazy method that “seasoned” summer residents use. Old car tires can be re-implemented for a reliable and cost-effective foundation.

Classic block foundation made of tires (with sheets of roofing material on top)
In the first case, columns of the required height are laid out from tires, which are subsequently filled with concrete mortar. Waterproofing (roofing felt) is laid on top, after which the construction of the gazebo begins with the lower frame, support pillars, and so on.


Important stages of construction
The construction of a foundation is indeed a complex process in terms of physical activity, but there are usually no problems with leaving the project and the sequence of work (this applies primarily to strip and monolithic foundations, since difficulties may arise with a columnar one due to savings).
Marking
After selecting the site and type of foundation, it is necessary to mark the site. For a columnar one, you need to mark the holes, and for a strip one, the width of the trench.
It is important to maintain the evenness of the pillars and trench. To do this, pull the cord and hammer the pegs strictly along it. In the future, you will need a level (a water level will be sufficient in most cases).

Marking strip foundation
Digging holes, trenches or platforms
![]()
Depending on the type of foundation, it is necessary to prepare a flat area for it with a certain depth. I’ll tell you a little experience that I gained in the manufacture of strip foundations.
Sharing our experience: my friend and I were digging a trench and it was necessary to go down to a certain depth (68 cm from the top edge of the formwork). Since the beginning of the trench was already ready, it was necessary to simply continue digging the soil to the same depth.
After we dealt with the roots of the cherry tree and pulled out all the necessary soil. To the eye everything was quite smooth.
To check the actual height of the foundation in each corner, it was necessary to take a meter ruler and lower it at several points. If the height was the same everywhere, then the trench could be called ready.
It turned out that our height difference is about 15 cm. This is not noticeable to the eye, especially when the soft, fresh soil is easily compacted underfoot. I had to dig up the remaining soil.
Manufacturing of formwork
The process is quite grueling, requiring the installation of formwork strictly to the level. To build it, you need chipboard or OSB sheets, boards, slats, screws, a screwdriver and a level.

Strip base formwork
All the work consists of leveling the walls in all projections, which, in addition, will also have to withstand the concrete solution and not fall apart. To do this, they are fastened with self-tapping screws. Connections should be as tight as possible.
Knitting reinforcement
Metal rods fastened with binding wire make the foundation truly strong and reliable. Without going into technological specifics, I will say: there must be at least some kind of reinforcement; under no circumstances should you refuse it, otherwise your concrete solution may fail.

Each foundation uses its own reinforcement; for bored piles and a monolithic foundation it will be fundamentally different. I suggest you watch a video that clearly shows the process of knitting a reinforcement cage.
Preparation of concrete solution
There are three possible options here, each of which has advantages and disadvantages.
- Buying ready-made concrete mortar in a “mixer”(from 3,500 rubles per cubic meter plus delivery to the site). In addition to being expensive, you will need to sell the solution quickly, as it hardens quickly. In the case of mixing it yourself, the rush will be noticeably lower.
- . The physical stress associated with manually mixing sand, crushed stone, cement and water is eliminated, and the solution is truly mixed (it is more difficult to achieve this result manually). A serious disadvantage is that the speed of pouring the foundation will not be able to move faster than mixing the solution in a concrete mixer. If we are talking about a large number, then this is very noticeable.
- Mixing the solution in a trough or film. The most labor-intensive method that does not require special equipment. You will need shovels, buckets and a great desire to stir, stir and stir some more.


For light structures (for example, a wattle gazebo), support is not needed. Solid gazebos (stone, brick, massive iron) need a reinforced foundation.
Foundation for a gazebo. The power of the support depends on the mass of the structure.
An additional motivation for building a solid base is the presence of precise elements in the structure of the gazebo (windows, doors). Their functionality can be impaired even by a slight distortion of the structure.
Why do distortions occur?
It's all about the soil: it sags and squeezes out (heaves). There are two main reasons for its deformation:
- Seal. Loose soil can become compacted under the weight of the structure. Especially under the influence of rain and melt water.
- Swelling. Water expands significantly when it freezes, increasing the volume of the soil. The pressure exerted on the foundation in the horizontal plane (on the foundation walls) is insignificant. But vertical heaving is very dangerous - it raises the foundation. Since soil moisture is uneven, the movement of the walls is also uneven along the entire length. This leads to deformation of supporting structures, the appearance of cracks, and distortion of door and window frames (even to the cracking of glass!).
Heaving soils include clays and alumina. From pebble and sandy areas the water “goes” down. Its remains, expanding when freezing, fill microvoids. No swelling occurs.

Distortions and swelling. The result of ground movement.
How to dig deep?
The depth of the foundation depends on the type of soil and the depth of its freezing, characteristic of a particular region. You can roughly get your bearings using the following table, compiled according to SNiP (indicated in meters):
Maximum values: when drawing up SNiP, the most unfavorable conditions are taken into account. The presence of natural (snow, ice) and artificial insulation is not taken into account.
Even if the freezing depth is still far away: sand (not to be confused with sandy loam - fine, dusty, dense sand) does not swell significantly and can serve as a reliable support for the foundation.

Foundation depth. The freezing indicator becomes irrelevant when it is possible to “get to the bottom” of coarse sandy soil.
Simple foundations for gazebos
Most gazebos are quite simple and lightweight. They use shallow foundations or do without them at all.
Gazebo without foundation
There is no need for a foundation for very light houses: gazebos made of living plants, wickerwork, lattice wooden structures, frames and canopies supported by dug-in posts.
The floors here can be “poured” with concrete into a pre-dug outback pit of approx. 15 cm. Such a monolithic slab can serve as an excellent and practical basis for a light gazebo.
Simple stone supports
In order to save money, old modest houses in Russia were built with virtually no foundations: large stones were laid in the corners of the building, on which the lower frame frame rested. This is not the best solution for the home, but quite sufficient for a wooden gazebo.

Stone support. A simple foundation for lightweight structures.
How to do it?
A similar foundation is set up like this:
1. Marking. The perimeter of the future structure is marked on the allocated area.
2. Installation of stones. Large stones are used for laying in corners (their size depends on the massiveness of the structure). For light gazebos, a rubble measuring 50x50x50 cm is sufficient.
The stone is “sunk” into the ground so that it protrudes above the surface to a height of 10-15 cm. It is important to consider the following:
- A layer of sand (10-15 cm) is placed at the bottom of the hole under the stone. This will make the position of the stone more stable and facilitate alignment during installation.
- All stones must be “exposed” with a flexible water level into a single horizon.
- The stones are not smooth. Therefore, it is important to install them in such a way that the most convex upper part falls on the line along which the arbor base bar will be laid.
3. Laying beams. Now you can build the lower part of the gazebo frame. Waterproofing must be laid under the timber so that moisture does not rise up and penetrate into the wooden parts of the structure.

Laying beams. The next stage of constructing the support.
The gap between the gazebo mass and the ground (actually, the ground, the site), which is the height of the protruding part of the support stones, can serve as excellent protection for the wooden floor of the gazebo from rotting: there is excellent air exchange and ventilation. But it can be lined with stone or brick in the form of a plinth.
Concrete block gazebo foundation
It is a flat area with blocks in the corners, as well as under the walls (in places with increased load). It is used for very light structures with unstable, wet soil, in flooded areas.
How to build?
Like simple stone supports, blocks need to be leveled, prepared and leveled.
Columnar foundation
It is installed in the corners of the structure and in the most “critical” places (joints of the structure, interface of elements, walls, additional supports of extended sections of the wall).
Video: Simple foundation for a gazebo
The essence of a columnar foundation is savings without loss of efficiency: relying on deep, non-freezing layers of soil, the foundation remains stable, although it is not continuous (for example, like a strip foundation).
On non-heaving soils (coarse sand, rocky foundations), such a foundation may not be buried below the freezing level.
It is constructed as follows:
- Marking. The site is marked using a rope, tape measure and pegs (milestones).
- Preparation. The soil (chernozem) is removed because it contains a large amount of organic matter that is prone to rotting.
- Drilling. The holes can be made with a drill or dug with a shovel.
- Creating a support. A layer of sand (15-20 cm) and the same amount of crushed stone are placed at the bottom of the pit. The sand is poured with water to compact it, the crushed stone is filled with liquid concrete mortar.
- Installation of pillars. After a few days, having laid a layer of waterproofing (roofing felt) over the concrete, they begin to install the columnar supports.
Their features depend on the qualities of the materials used:
- Asbestos-cement pipes. Installed strictly vertically. The interior space is filled with concrete.
- Steel pipes. Does not require filling inside. But it is worth providing protection against corrosion (painting; chemical oxidation).
- Stone, brick. The pillar is laid out in compliance with the laying rules.
- Concrete. The contours of the pit are used as natural formwork. Reinforcement of the pillar is highly desirable.
Using the same principle, the columns of a wooden frame are buried, the underground part of which can be considered a columnar foundation.
Pile-screw foundation for gazebo

Piles are metal pipes secured with an auger. This pipe is screwed into the ground like a screw.
It is used for quick construction of foundations in unfavorable conditions (very deeply frozen soils, flooded areas with high groundwater levels).
The advantages of such a foundation are especially easy to appreciate in poor soils:
- Rapidity. 1 day is enough.
- All-season work. You can drill into the ground in winter.
- Independence from soil quality. The piles are drilled into non-freezing layers.
- Power. This is a strong foundation that can support an entire house.
- Water resistance. Metal does not absorb water and does not transfer it upward to the building.
- Price. This is the cheapest type of foundation under the least favorable conditions.
There is no point in installing piles under a gazebo in dry, stable soils with a shallow freezing depth. The technology is beneficial (virtually irreplaceable) in difficult conditions.
How to screw in piles?
You can screw in the piles yourself, but as part of a team of 2-3 people. This is done as follows:
1. Marking the area. The site is marked, and stakes that are not tied to a cord are driven into the drilling sites. The corners of the future structure are drilled first. Then the piles are screwed into the gaps.

You can screw in the piles yourself, but as part of a team of 2-3 people.
2. Mounting recess. First, select a hole at the drilling site using a drill to make it easier to place the pile exactly in the required place.
3. Installation of the pile at the work site. The pile is installed and screwed in several times. They set it according to level.
To make it easier to control the evenness of the vertical position of the pile during screwing, two construction levels are attached to it with tape (to control its position “left-right” and “forward-back”).
4. Screwing. A steel scrap is inserted into special holes, onto which pieces of pipe are placed, acting as a lever. The pile is rotated in the appropriate direction, drilled into the ground.
It is important to ensure that there are no distortions. The distance between piles (permissible minimum) is 1.7 m.
A metal frame is welded to the screwed-in piles along the entire perimeter of the gazebo. If you plan to install a wooden structure, special metal platforms are attached to the tops of the piles - caps, to which the bars are screwed.
Foundations for heavy gazebos
Wooden and log structures are quite light, but for gazebos made of stone and brick (especially massive ones, with a large area of masonry, two-story brick gazebos with observation platforms, etc.) a powerful foundation is needed.

Capital foundation. These include strip foundations and solid monolithic foundations.
Strip foundation for gazebo
It is a concrete or stone wall buried down to a frost-free layer of soil.
How to make a strip foundation yourself?
The work begins with preparing the site: it is leveled and cleared of weeds. Then the main work begins:
- Marking. The site is marked out according to the prepared plan. They drive poles into the corners and connect them with a cord.
- Excavation. Dig a ditch to the sandy soil or, if there is none, to the entire freezing depth. The width of the future foundation is 30-35 cm.
- Making a pillow. A layer of sand (10-15 cm) is placed at the bottom of the trench, which is watered with water from a hose (with a sprayer) to compact the cushion.
- Reinforcement. A layer of crushed stone (10-15 cm) is placed on the sand, which is filled with liquid concrete mortar. Then reinforcement is installed along the entire perimeter of the foundation. For this, construction reinforcement (dia. 8-10mm), thick wire scraps (5-6mm), and pieces of metal are used. It is important to “tie” the reinforcing belt together by welding or thick wire.
Special carbon fiber rods, which have proven themselves well in construction, can also be used as reinforcement. - Filling. The foundation is poured with concrete or laid out with torn rubble (shapeless natural stone) in cement mortar. It is not recommended to build the underground part of the foundation with bricks due to its hygroscopicity.
- Removing the outer part. The basement part, which rises above the plane of the site by 10-15...30-35cm (depending on the flatness of the site, water level, etc.). Formwork made of boards and other flat materials is installed at this height.
- Waterproofing. The finished foundation, regardless of the presence of a plinth (you can lay out the walls right away, or you can first “build up” it with stone by laying out the plinth) is insulated with a layer of roofing felt.

Strip foundation. Quite labor intensive, but reliable and durable.
A strip foundation is a reliable foundation for a structure of any mass. But it can be strengthened if the inner area of the rectangle of the future gazebo is also filled with concrete. This is already a monolith.
Monolithic foundation for a gazebo
All work is performed in the same sequence as when installing a strip foundation. The only difference is the pouring area - here the entire building area is filled with concrete.
In relation to a gazebo, a monolithic foundation can be lightened:
- Excavation. The pit is deepened over the area of the entire future gazebo (depth 25-30 cm). A trench is dug along its perimeter for a strip foundation.
- Reinforcement. The foundation, provided with a sand cushion and prepared by adding crushed stone, is reinforced.
- Pouring strip foundation.
- Top reinforcement. When the belt part is filled to the full depth (only 30cm of the pit remains to the top), the entire area is covered with crushed stone (10-15cm) and filled with concrete. According to this preparation, reinforcement is laid and tied, designed to turn the entire section into a continuous monolithic slab.
- Filling. The remainder of the volume is filled with concrete.
Monolithic foundation is one of the most expensive. Therefore, it is important to take a sober look at the situation and make sure it is appropriate.

Monolithic foundation. It differs from the strip type by the continuous filling of the platform and rigid reinforcement.
In addition to its high strength, such a monolith is attractive because it does not require additional work with the floors, except for decoration.
Car tires - an effective material or a fiction?
Tires have a number of advantages and only one drawback - they are toxic. True, harmful substances are released from rubber only when exposed to high temperatures, which is not relevant for foundations even in summer. But the advantages are undeniable:
- Swelling does not affect the stability of load-bearing structures, since for rubber, as a very plastic material, fluctuations in soil volume in winter are too insignificant.
- The seismic situation in some regions makes tire foundations indispensable.
- The moisture resistance of rubber makes such a foundation extremely durable.
- The cost of tires tends to zero.
How to do it?
The tire foundation can be constructed in two ways:
1. Monolithic slab (combined type). The entire area of the future building is a monolith. To create it, soil is removed to a depth of two tires (in height). The voids are filled with material that does not shrink significantly (crushed stone, broken brick, expanded clay, screenings). You cannot use backfills that cause severe shrinkage (sand, clay, earth).
The surface of the site is covered with waterproofing material (roofing felt) and filled with concrete with reinforcement.

Tire foundation. Cheap and effective material.
2. Corner. Tires are used to create supports at the corners of the structure and at the junction of walls. To do this, select soil to the required depth, lay a layer of crushed stone, on which tires are placed one on top of the other. The interior space is filled with concrete.
Each tire must be level. Otherwise, the entire “sandwich” will lie crookedly and it will be impossible to correct this defect.
For heavy structures, truck tires are preferable; for light and medium-sized ones, tires with a smaller diameter may also be suitable.
How to decide on the type of foundation for a gazebo?
An insufficiently reliable foundation means wasted money and effort. Even if the gazebo does not fall apart, but only warps, it will no longer be pleasing to the eye.
A foundation that is too powerful will not affect the aesthetics of the structure or its functionality. But cost overruns are not reasonable.
To choose the type of foundation, you just need to answer a few questions:
Will the gazebo be light?
- Yes, it is made of slats and boards. This is the lightest gazebo. It does not require a strong or medium foundation. Simple stones in the corners and blocks are enough.
- It's made of logs. Medium weight design (for gazebos). You can build a columnar foundation or “screw in” piles if the soil is wet.
- Made from rounded logs. Same.
- Iron gazebo. Same.
- Stone. Heavy gazebo. The best option is a strip foundation. If the gazebo is supposed to be very massive - solid, monolithic.
- Brick. Same.
Is the soil stable?
- Yes, this is coarse sand. A small depth (20-30 cm) is sufficient.
- No, it's loam. Deepening the foundation to a non-freezing area.
- Not stable. This is a swamp. The optimal solution is screw piles.
The gazebo is not the most massive structure; the foundations here are not such a critical area as in other buildings. However, you should not neglect the stability of the walls, because the attractiveness of the recreation area, and therefore the level of comfort and pleasure received from spending time here, depends on it.